Guide to Setup CNAME for root Domain in Cloudflare Account
Updated on : Jun 1, 2020
Category : Domains
This guide will explain how to add CNAME for root domains i.e. yourwebsite.com if your domain registrar does not allow this setup. Cloudflare allows setting up CNAME for the root domains as well.
Pros using CNAME for root domains.
- This will help you to point your root domain to Server’s Hostname and whenever you migrate the servers you don’t have to bother changing DNS records for all the Domains hosted on the particular Server.
- Saves time for the clients as not all are techy and do not have much experience with Domain DNS Records.
Requirements
Cloudflare Account with Domain added in the Account
Notes
- We are using yourwebsite.com as a domain and yournode.basezap.com as server’s/node’s Hostname in the guide for demonstration purposes.
- If you’re not sure what your Node is then please ask to support the support team at chat or by creating a Support Ticket by logging in to https://my.basezap.com URL.
Procedure
- Log in to the Cloudflare account.
- Find the list of domains and select the domain for which you want to setup CNAME for the root domain.
- Tap on DNS Tab where you will see all the existing DNS records for the particular domain.
- Remove the DNS A record for root domain i.e. yourwebsite.com in our case. Find Image below as reference.
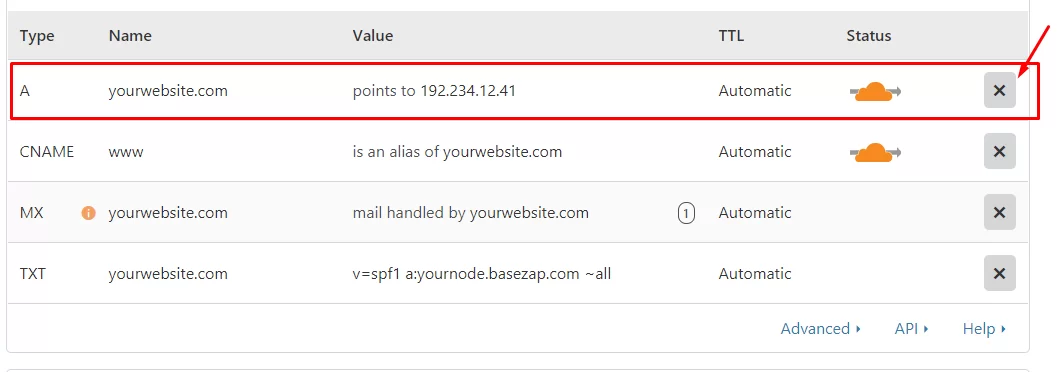
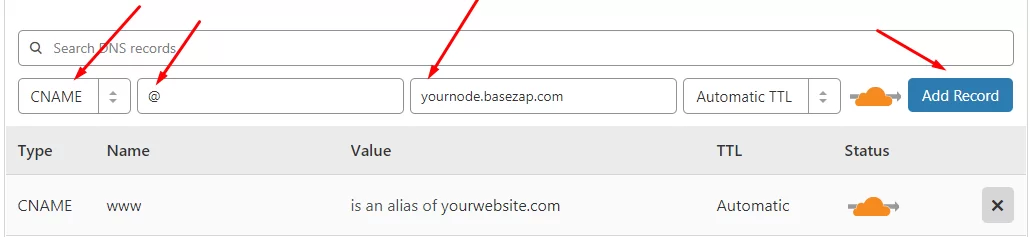
Deleting the A record will produce a warning, but don’t worry. You want to delete the A record since you’re about to add a CNAME at root pointing to your Server’s Hostname. - Add the Following DNS CNAME Records
Type: CNAME
Name: @
Value: yournode.basezap.com
TTL: Automatic
Cloud: Orange
Here ‘@’ automatically changes to root domain i.e. yourwebsite.com on saving the CNAME Record.
- Similarly, add CNAME record for www as well which will act as www.yourwebsite.com for your domain.
Type: CNAME
Name: www
Value: @
TTL: Automatic
Cloud: Orange
Here ‘@’ automatically changes to root domain i.e. yourwebsite.com on saving the CNAME Record which means www CNAME Record will share value from the root domain. - If you are using the same web server to send and receive emails then add/modify the MX and TXT Records. If you are using any 3rd Party Mail Server like GSuite, Zoho, Yandex, Amazon SES, etc then you don’t have to make the below changes as they will remain same as provided by your Mail Server Admins.
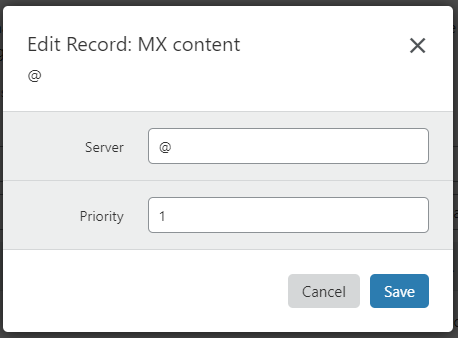
Type: MX
Name: @
Server Value: yourwebsite.com
Server Priority: 1
TTL: Automatic
Type: TXT
Name: @
Value: v=spf1 a:yournode.basezap.com ~all
TTL: Automatic - After saving the DNS Records your DNS List will look similar to below image.
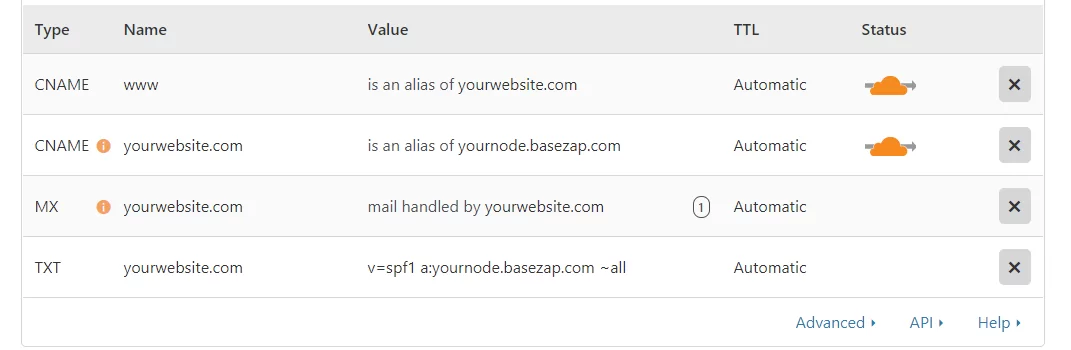
With this, you have finished setting up CNAME for root domain using Cloudflare.