Install LiteSpeed Cache Plugin in WordPress Website
Our servers are equipped with LiteSpeed Web Server for better performance and better resources management on the servers. There are few users who are highly concerned with the website load times and want to make use of caching mechanism using some plugin for their WordPress websites. Today we have good news for the users who are concerned with the load times of their websites. This guide will explain and help you to install LiteSpeed Cache plugin on WordPress CMS websites.
Read more about LiteSpeed Web Server Cache here.
Requirements
- WordPress Dashboard Admin Access
Installation Procedure
- Login to WordPress Dashboard.
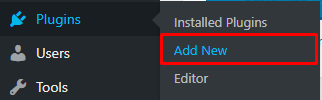
- Head over to Plugin -> Add New.
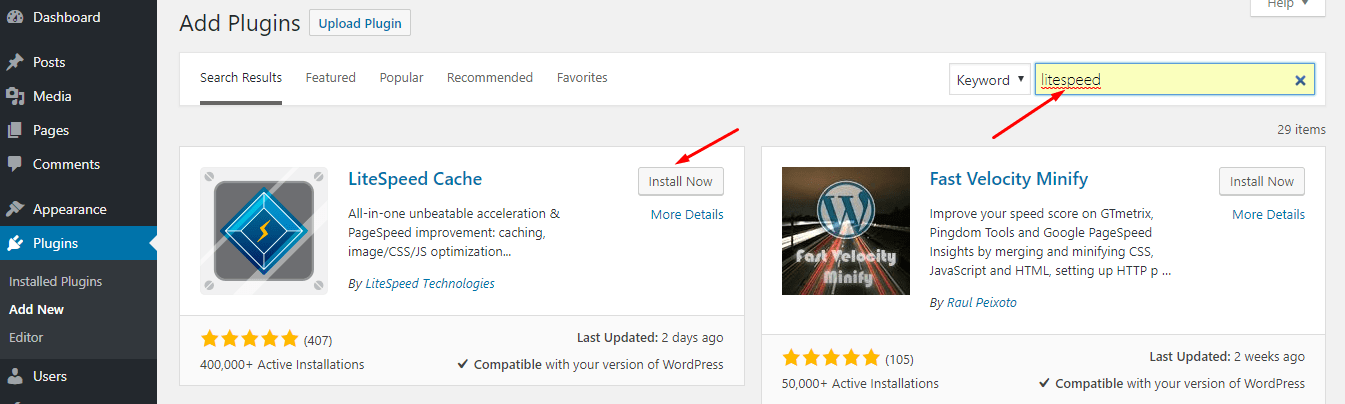
- Search ‘LiteSpeed Cache’ in the Search Bar and install the Plugin from LiteSpeed Technologies as shown in Picture and Activate the Plugin.
- You can see the LiteSpeed Cache Option in the Left Sidebar of the Dashboard after activating the plugin.
Basic Plugin Setup
- Login to WordPress Dashboard.
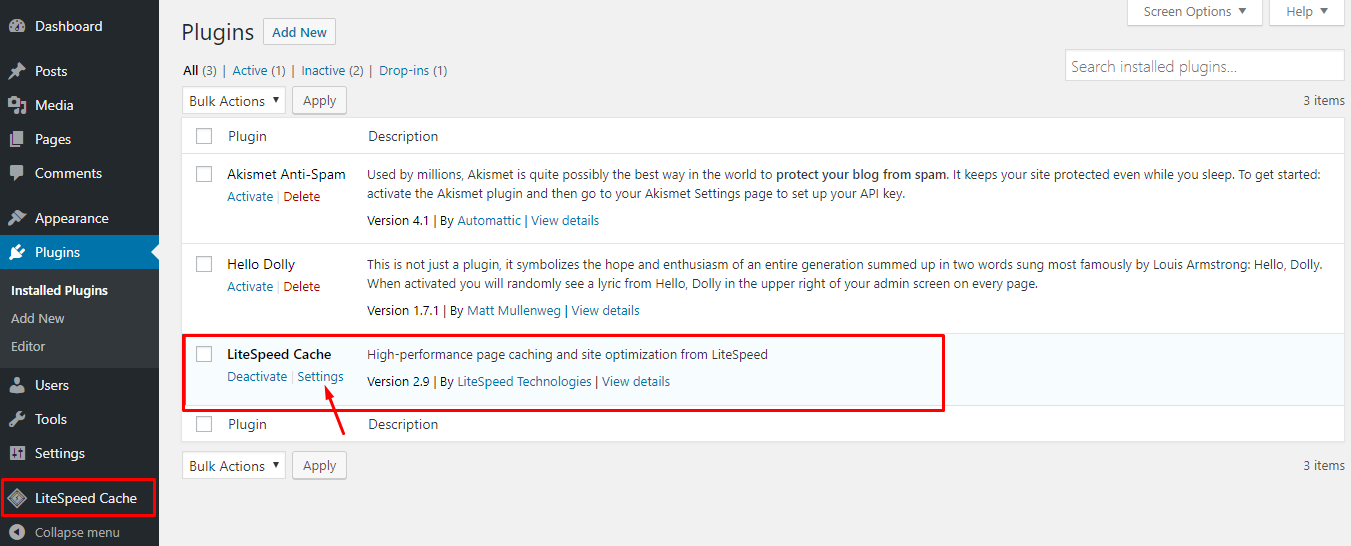
- Open All Plugins List and tap on Settings Option for LS Cache Plugin which will take you to Plugin Settings.
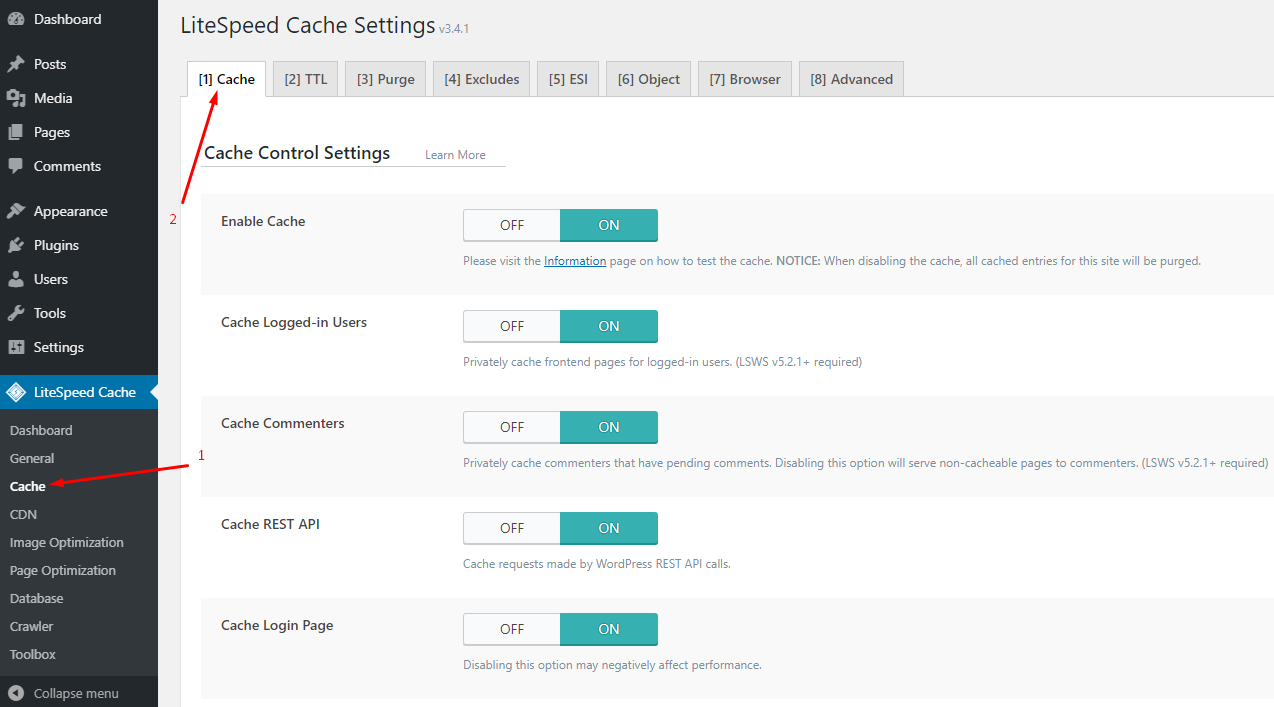
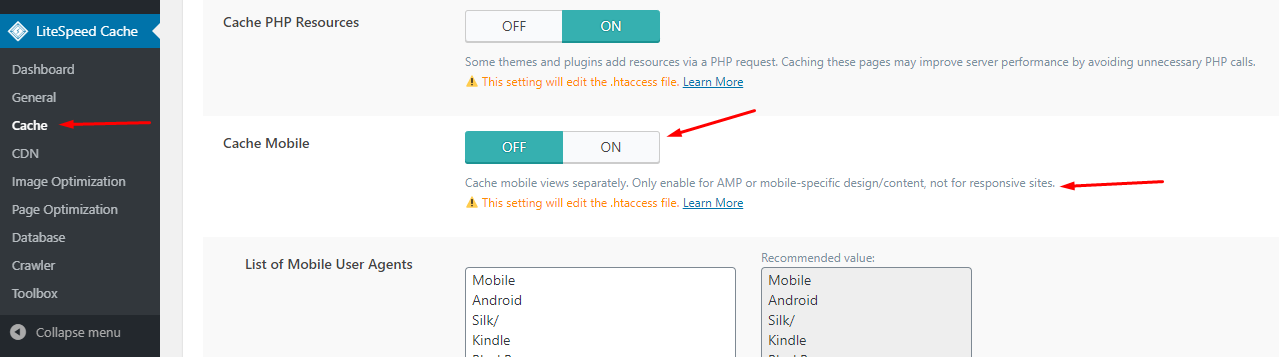
- Find Cache option in the left sidebar LiteSpeed menu and look for Cache Mobile Option under Cache Tab and Turn in ON followed by pressing the Save button.
Note: Do not enable this option if your website design is responsive. This is required for those websites which have a different design for mobile devices and have custom theme settings. If you are quite unsure about this option then you can keep it disabled.
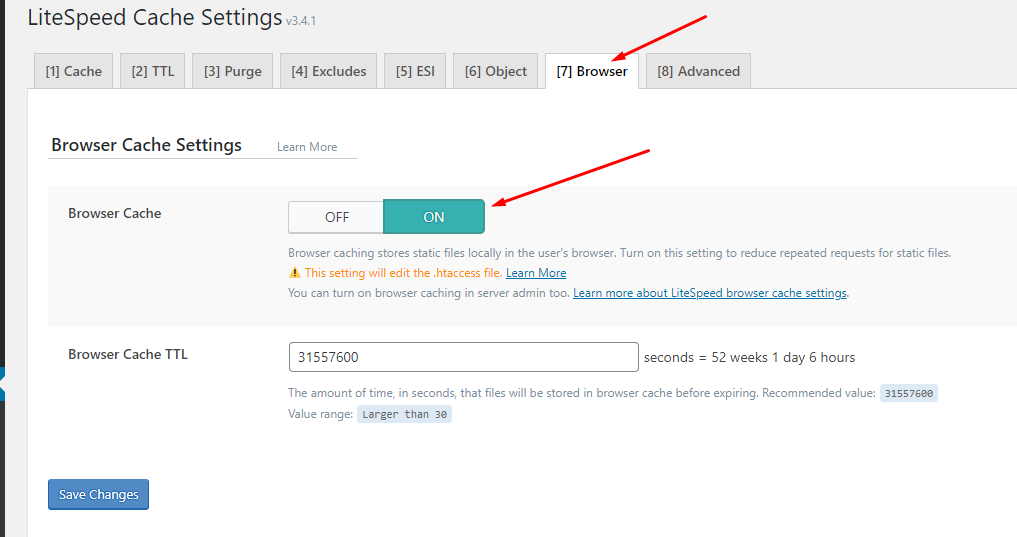
- Under the Browser, tab look for the Browser Cache option and Turn in ON followed by pressing the Save button.
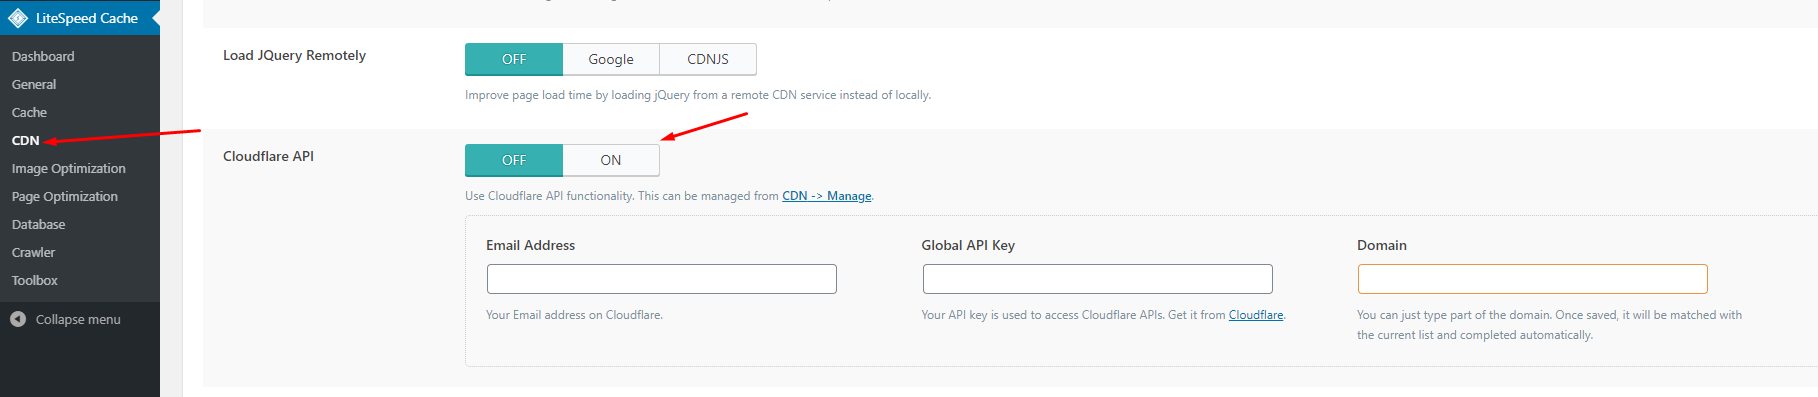
- If you are using Cloudflare for your Website then you can integrate the Plugin with Cloudflare API by tapping on the CDN Option from the left sidebar and looking for the Cloudflare Section at the bottom of the page under the CDN Settings Tab. Enter Cloudflare Email, API Token, and Domain name followed by pressing the Save Button.
With this, we finished the guide to install LiteSpeed Cache Plugin and basic setup on the WordPress Website. If you face any kind of issue with the LS Cache Plugin setup kindly contact us at technical@basezap.com or create a support ticket following this guide.