Import Posts with Featured Images on WordPress
Updated on : Sep 12, 2021
Category : WordPress
Are you moving your WordPress posts to another website and facing issues with images and featured images? In this guide, we are going to go through the steps to properly import the posts with images and featured images.
Steps to Import Posts with Featured Images on WordPress:
GUI method to Import Posts with Featured Images:
- Login to WordPress admin of the Old website where the data exists.
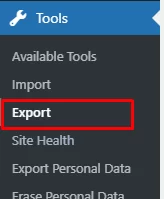
- Head to the Tools section on the left toolbar and select Export as shown in the screenshot below.
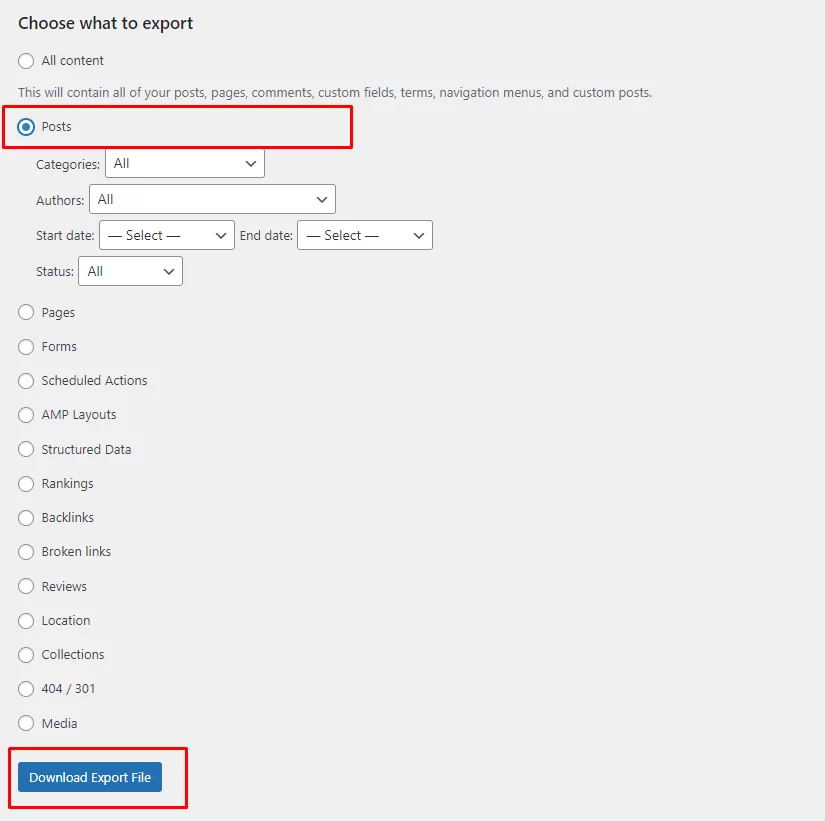
- Select Posts and your preferred Post selection and click on Download Export file as shown in the screenshot below.
- This will generate XML files and the download will start.
Note: If you are facing a timeout error due to a large number of Posts. Please scroll down and refer to the WordPress CLI method. - Install Export Featured Images plugin.
– Go to Plugins > Add New
– Click the Upload button.
– Click on Browse and locate the downloaded zip file.
– Press the Install Now button.
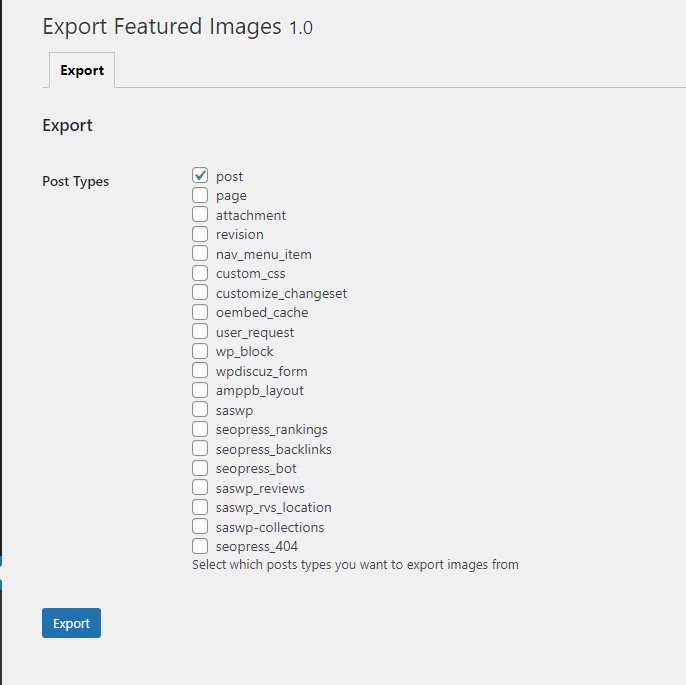
– After installation is complete, click on the Activate Plugin button. - Goto the Export Featured Images plugin and select Posts and click on export as shown in the image below.
A new XML file will be generated and downloaded. - Head over to the new website where you want to import your posts. From the Tools section on the left toolbar and select Import.
- Select the Posts export file and start the import. After the import is complete Select the New XML file created from the plugin and start the import.
Note: If you are facing a timeout error due to a large number of Posts. Please scroll down and refer to the WordPress CLI method. - After the Import is finished successfully your Posts are now imported to the new website with featured images.
WordPress CLI method to Import Posts with Featured Images:
- For this method, you require SSH/Terminal access to your server.
- Login to SSH of your server and install WordPress CLI by following the official guide here.
- Navigate to the directory containing the website’s files and use the following command to export the posts.
wp export --dir=/path/of/file --post_type=post --start_date=2008-01-01 --end_date=2021-05-20
Note: Make changes to the path where you want your exported files to be located, the start and end date according to the requirement. - After finishing the export, follow Step 5,6 from the GUI method to export the featured images by using the Export Featured Images plugin.
- Download and move all the generated XML files to the new server and into the directory of the new website.
- Install WordPress CLI on the new server by following step-2.
- Use the following command to start importing from the XML files.
wp import example.2021-05-20.xml --authors=create
Note: Change the filename in the command to the correct filename. You can also change –authors=skip in order to skip the generation of new users on the import. - Run the above command for all the XML files generated including the XML generated from the plugin.
- After the Import is finished successfully your Posts are now imported to the new website with featured images.
Facing errors on WordPress? Start debugging by following our guide here.