Create Custom Nameservers using your domain.
Updated on : Feb 5, 2018
Category : Domains
Hello,
Today we will guide you how to create custom nameservers using your domain. Following this guide, you will learn how we can create custom nameservers using a domain and use it on our Linux machine after following cPanel WHM installation tutorial here.
Requirements
- Domain
Process
- Login to domain registrar account.
Note – We will use GoDaddy for Domain management. - Tap on your Name on top bar for dropdown banner
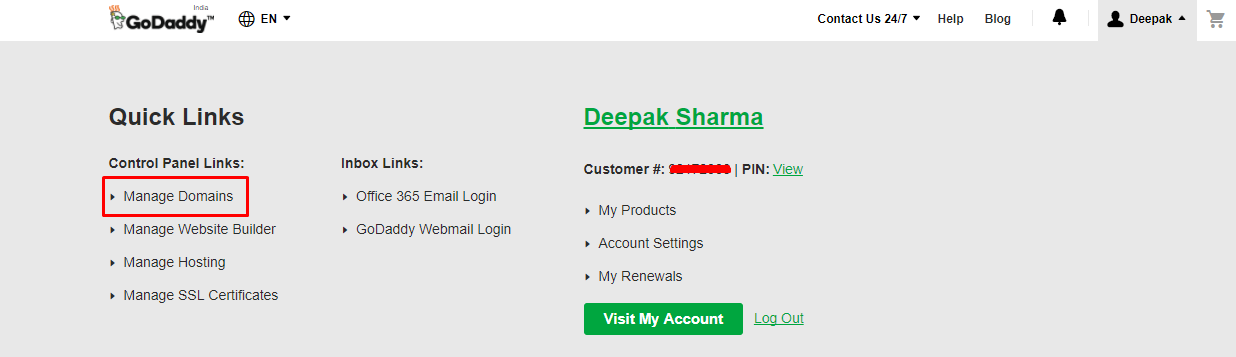
- Select Domain from the list and Press ‘Gear’ icon to go to Manage DNS
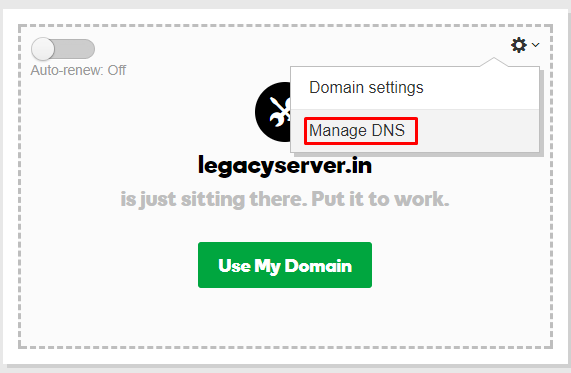
- Under Records, section scroll down to find ‘Add’ button
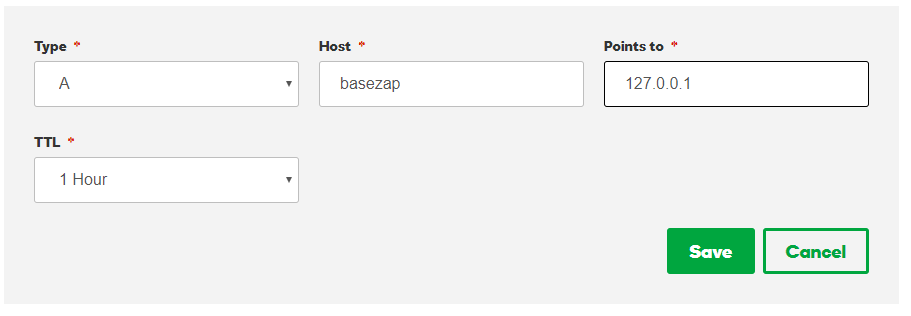
- Create 3 ‘A Records’ under this using the following information and save.
Type = A
Host = ns1 (any name for first name server)
Points to = 127.0.0.01 (Server IPv4)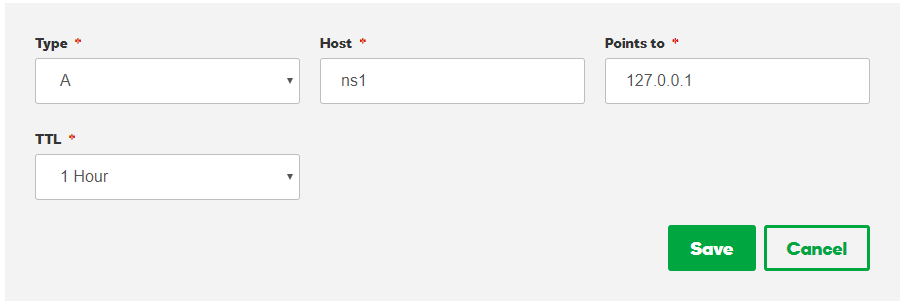
Type = A
Host = ns2 (any name for second name server)
Points to = 127.0.0.01 (Server IPv4)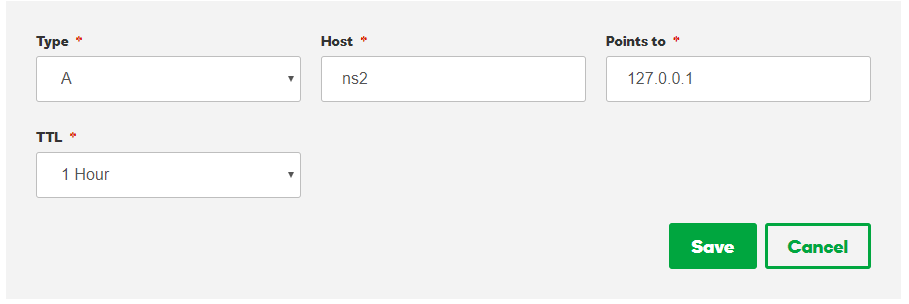 Type = A
Host = basezap
Points to = 127.0.0.01 (Server IPv4) - Move to Advanced Features and select Hostnames
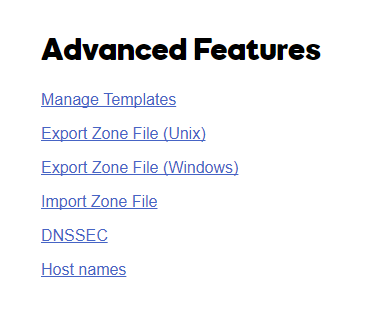
- Add two new record with the following information and save.

Nameserver 1
Host = ns1 (same as first A record created)
IP address = 127.0.0.1 (Server IPv4)
Nameserver 2
Host = ns2 (same as second A record created)
IP address = 127.0.0.1 (Server IPv4) - Login to your Server using SSH and follow this guide to install cPanel + WHM on your VPS or Dedicated Server.
Note – Use our above custom created nameservers while following the installation tutorial.
Follow our cPanel WHM Installation Tutorial. - After successful installation and completing setup wizard for WHM, you are ready to create user accounts for cPanel and start adding your new domains using our custom nameservers.
Hope you liked the guide and is easy to understand. Feel free to contact us if you are facing any problem or seeking any kind of help regarding this guide.