How to Install cPanel and WHM on CentOS VPS and Server
Step by step guide on how to Install cPanel and WHM on CentOS VPS or Dedicated Server.
cPanel provides a 15-days trial and after that user has to purchase the commercial to continue using its services.
Requirements:-
– Fresh installed Linux Distribution, i.e. CentOS (minimal installation preferred)
-Root permissions
– At least 1GB RAM
– At least 20GB HDD/SSD Space
Procedure:-
- Log-in to root on your CentOS VPS or Server.
- Run
tmux
or
screen
command to open instance just for making sure the installation process doesn’t interrupt on SSH connection.
TIP- If SSH connection disconnects while installation then use,tmux -a
to attach to the same instance for tmux users.
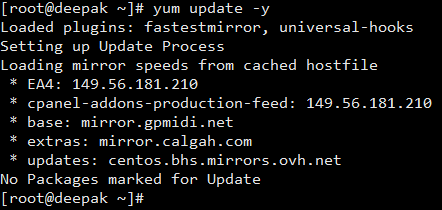
screen -r to attach to the same detect for screen users. - Update your machine to which latest packages and libraries using the following command.
yum update -y
If you don’t have valid hostname set, then you can set a temporary hostname using the following command.hostname host.example.com
we are using deepak.basezap.com as hostname
- Run one of the following commands to clone/download the cPanel auto-installation script
curl https://securedownloads.cpanel.net/latest >> cpanel.sh
or
wget -N https://securedownloads.cpanel.net/latest -O cpanel.sh

- Give execute permissions to downloaded script using the following command.
chmod +X cpanel.sh
- Run cpanel.sh script
sh cpanel.sh
- This script will automatically download and install required packages to your server and setup cPanel and WHM within few minutes or hours depending upon the specification of your machine.
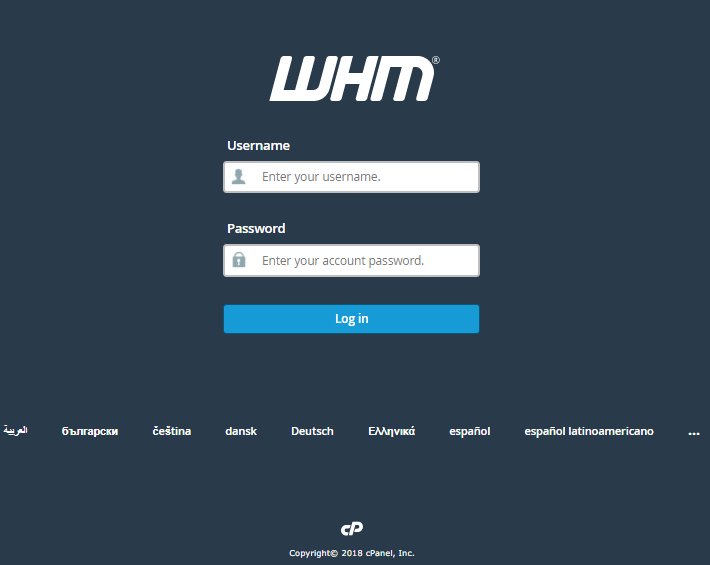
- Now you have to open your browser and access the web-UI of WHM for Setup-Wizard. Access using following URLs
https://your-server-ip:2087
OR
https://your-host-name:2087
NOTE-WHM Panel always runs on HTTPS - Credentials for WHM will be as following,
username: root
password: your_root_password
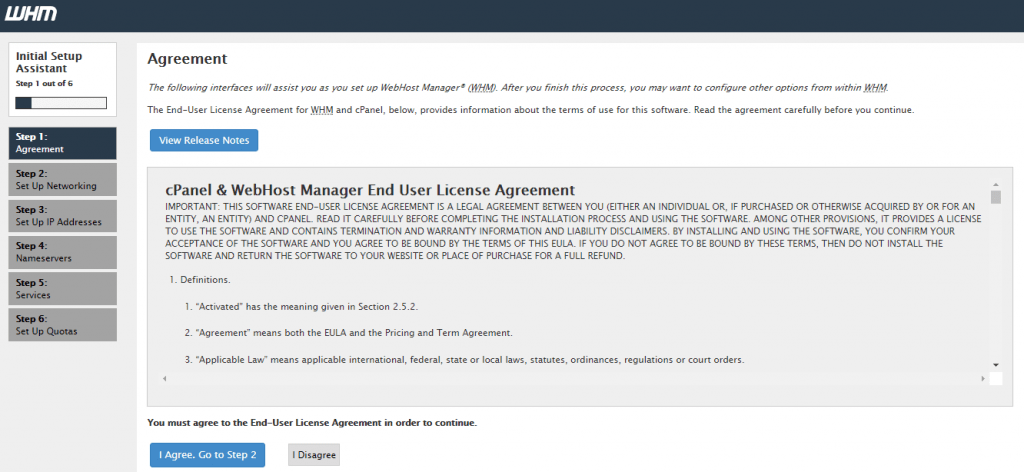
- You can see the Setup-Wizard, and the first page is License Agreement which you have to read and Accept the terms & conditions if you agree with them or else you can close the Setup Wizard and start the pack-up of your machine.
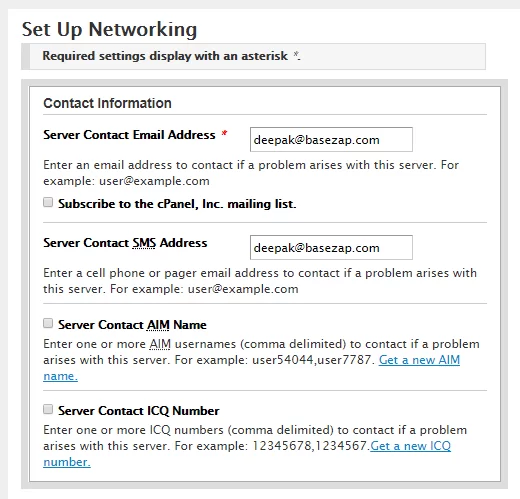
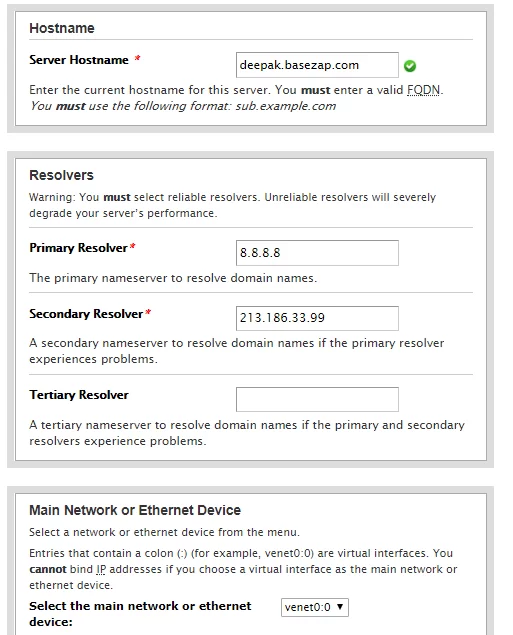
- Next Page will ask you to fill out the contact information like contact email address, contact SMS address and few other information, do fill them accordingly and proceed to the column of Hostname, Resolvers and Main Network.
Here you have to fill the valid FQDN hostname, and other options can be kept default unless you know their function.
- After proceeding next Option, it will ask to enter IP address information of Server.
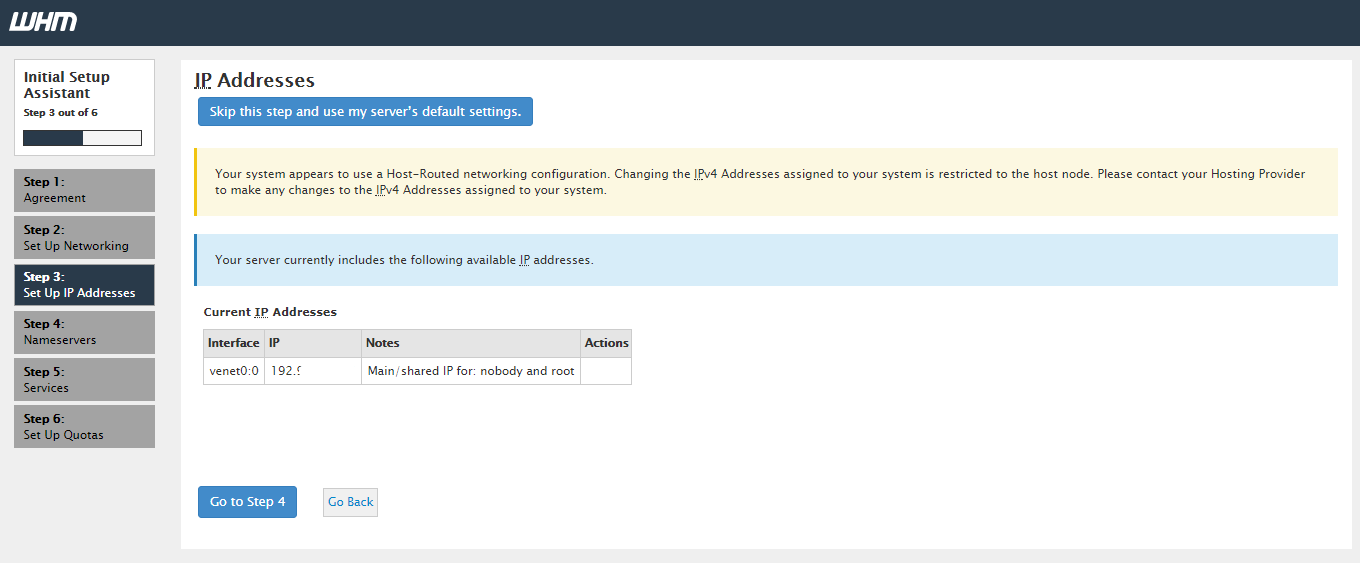
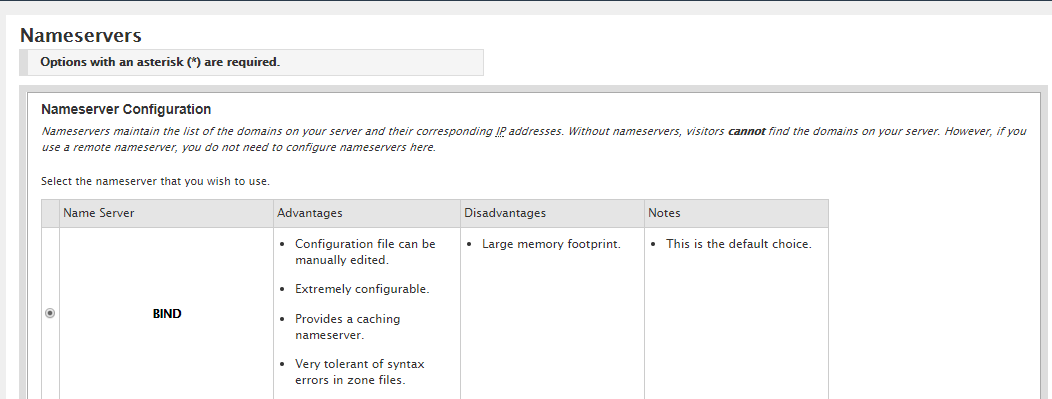
Note– IP hidden for confidential purposes. - Next Step will ask you about NameServers information which is very important. The core functionality of WHM and cPanel is dependent on this NameServers configuration.
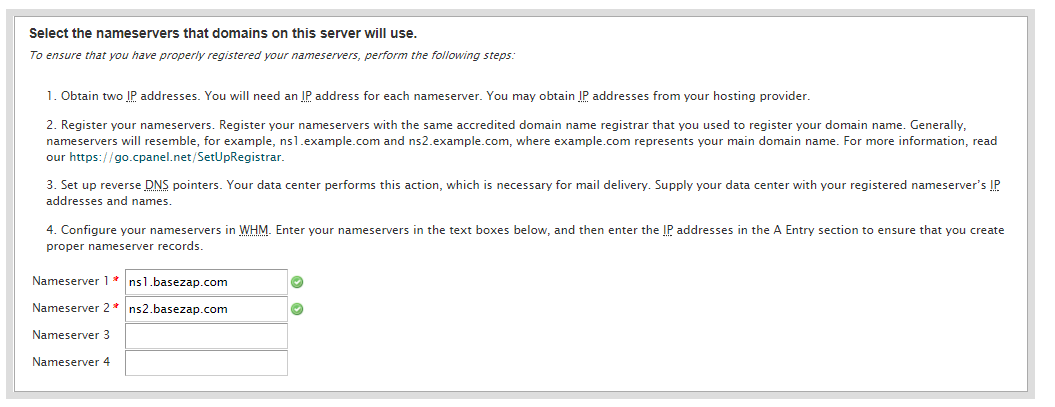
We have added two name servers ns1.basezap.com and ns2.basezap.com under our configurations and proceeded next.
You can read those four steps in Setup Wizard for more information about NameServers.
Follow our tutorial to create nameserver using domain.
- Next step is configuring FTP feature that your WHM and cPanel will use.
We are using PureFTPD FTP Server.
On the same page, there are few essential features for Bruce-force attacks, and you can enable them accordingly.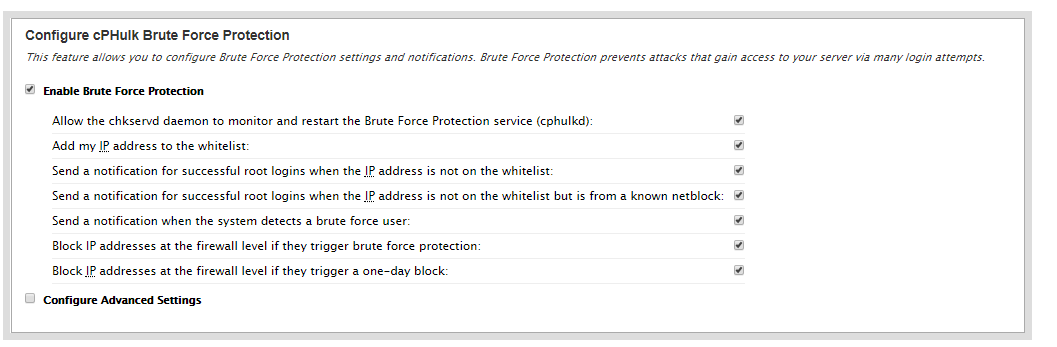
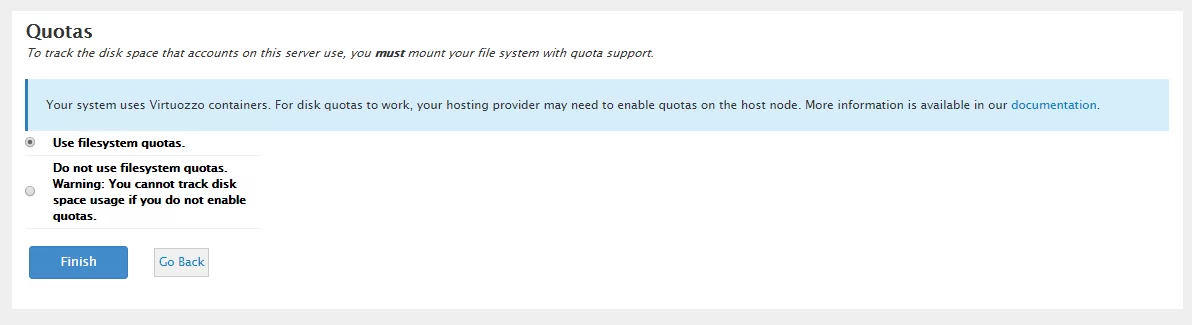
- Next Step involves enabling filesystem quota or not; we prefer using filesystem quota for easy tracking and management of disk space usage.
- Finally, the Setup Wizard finishes, and it will take you WHM Panel if you have the valid license of cPanel for the Server or it starts in 15-days trial.
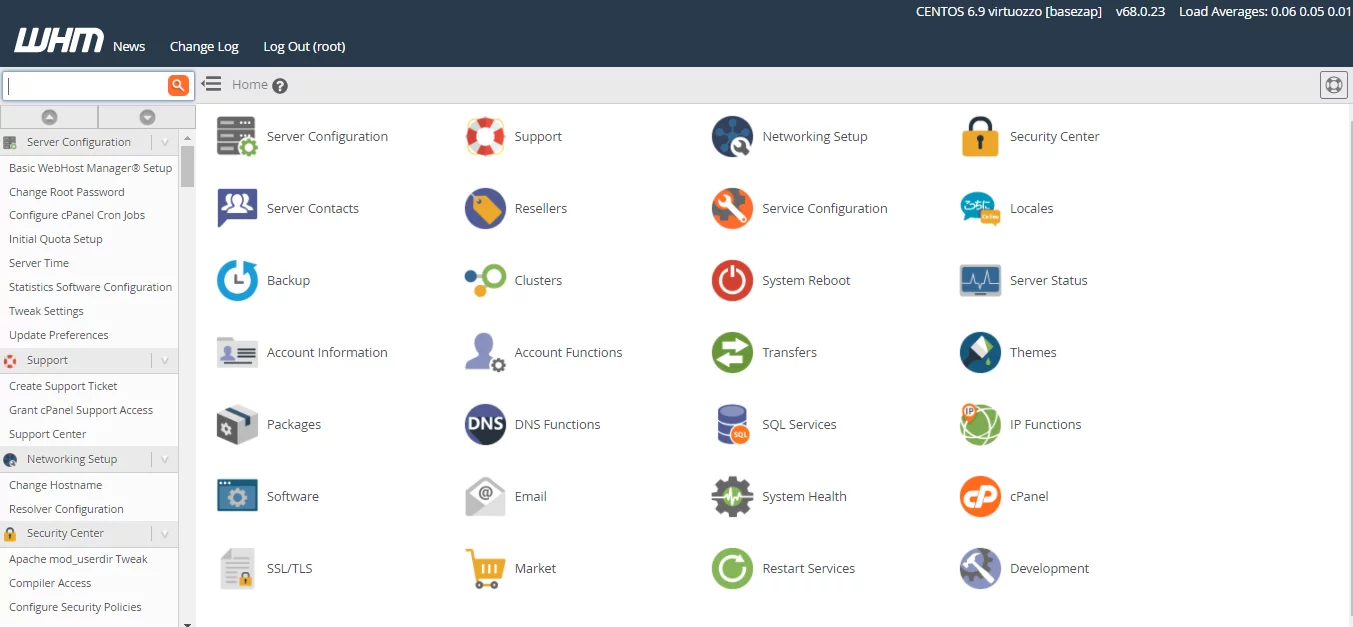
- Here is how WHM Homepage will look like after successful installation.
TIPS
#1 If you have the license key and cPanel installation script doesn’t detect the key then you can follow this tutorial for fixing it.
How to Update cPanel License Key / Run License Script
#2 If you want to install NGINX then follow this tutorial for installation steps.
Guide to Install NGINX on cPanel/WHM Server
Here your cPanel and WHM installation is completed and you can start using WHM configuring it. Now you can create cPanel individual accounts for the customers those who want to use web-hosting services..