Backup Restoration Process for Starter Hosting Users
Backup Restoration Process for starter hosting users.
Oops! Did you accidentally hit the delete button and now your files are gone? Or maybe you just want to go back in time and undo some changes? Don’t worry, we’ve got you covered with our awesome daily remote backup feature that comes free with all our starter hosting package.
So, what do you need to do to restore your precious data from a previous date? It’s as easy as 1-2-3! Just follow these simple steps:
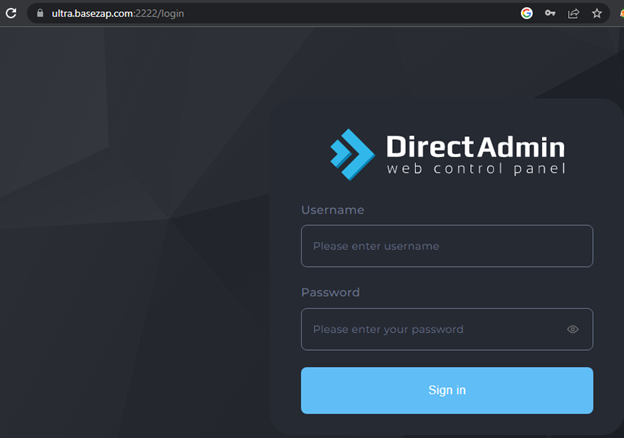
Step 1: Log into User Panel, To begin the backup restoration process, access your User panel by navigating to https://ultra.basezap.com:2222 page. Enter your credentials (username and password) and click on the “Login” button. Once logged in, you’ll be greeted by the Userpanel dashboard.
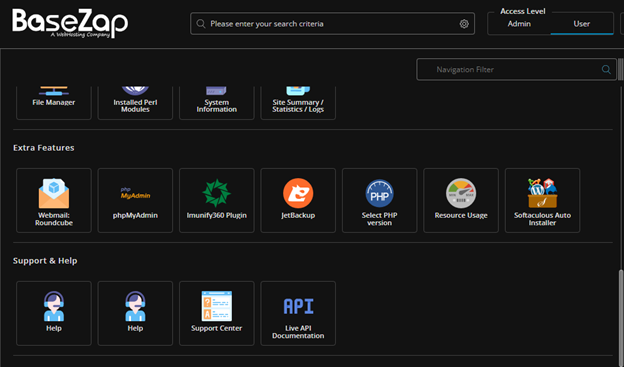
Step 2: Navigating to JetBackup Within the Userpanel dashboard, locate the “JetBackup” icon. It is represented by a cloud with an arrow pointing upwards in the extra features tab. Clicking on this icon will open the JetBackup control panel.
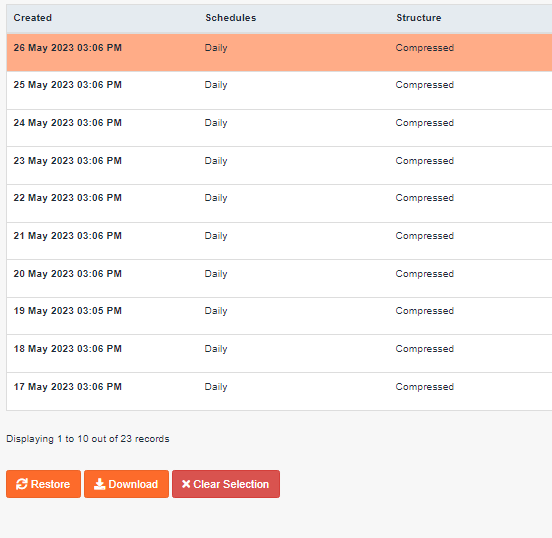
Step 3: Accessing the Backup Manager In the JetBackup control panel, you will find various options related to backups. To initiate the restoration process, click on the “Full Backups” tab. This will bring up a list of available backups.

Step 4: Choosing the Backup File In the Backup Manager, you’ll see a list of backup files organized by date and time. Identify the backup file you wish to restore and click on the corresponding “Restore” button.
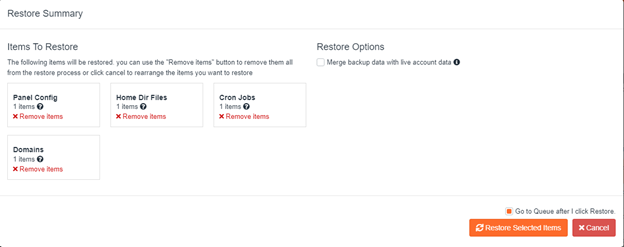
Step 5: Initiating the Restoration Once you have configured the restoration options, review your selections to ensure they align with your requirements. If everything looks good, click on the “Restore Selected Items” button to start the restoration process. A progress bar will appear, indicating the status of the restoration.
Step 6: Verifying the Restoration After the restoration process is complete, JetBackup will display a notification confirming the successful restoration. It is essential to verify that your website’s data and files have been restored correctly. You can do this by navigating to your website and checking its functionality, as well as reviewing the restored data within the Userpanel control panel.
Conclusion: Backing up and restoring your website’s data is a crucial task that ensures the safety and continuity of your online presence. With BaseZap and JetBackup, the process of restoring backups becomes a breeze. By following the step-by-step guide outlined in this blog post, you can easily restore your backups and get your website up and running in no time.
Disclaimer: Please note that restoring a backup will result in the complete replacement of all your user account data with the information contained in the selected restore point. It is important to understand that we cannot be held liable for any loss of data resulting from the restoration process, particularly if an incorrect backup date is selected. Therefore, we strongly advise that you exercise caution and carefully select the appropriate backup date before proceeding with the restoration process.