How to Setup git Repository using GitHub
Hello,
Today we will guide you how to setup git repository for code that can be new or existing code locally. Steps to perform the task are easy and requires no coding knowledge. To setup git repository we only need necessary things.
Requirements
– git installed on your PC or Server. Get here
– Internet Connection
Procedure
– We will open git bash for Windows and terminal for Linux and then change directory(folder) where we want git to be initialized, and if we want to setup git repo for the existing code we will do as the following pic, and for new code, we will have to create a new directory and then cd to it and then move to next step.
![]()
TIP: –
cd dir_location
dir_location is full folder path where you want to work with git.
– Run command
git init
We can see the following message after git initialised in the working directory.
– So our current dir is ‘BaseZap’ where we can do work like add, remove or change, For now, we will add some, and after running dir command, we can see our files in the dir.

– After addition of our scripts to BaseZap folder, we will check status of git in the particular dir with command
git status

Here it will show log files like structure which depicts that the files displayed in the directory are added and are untracked by git and have not been committed. So in next step, we will add them to git which means to track them and later commit them.
– Run
git add -A
this will track all files using git and then we do git status again to check the status of the files inside our BaseZap dir.Here it shows our files in green colour which means these files are now tracked by the git and are ready to be committed.

– To make a commit, we will have to run the command
git commit -m “commit message”
TIP – commit message tells what the purpose of that commit is and what does it do in the code.In our terminal of cmd, it will show that commit has been created and files have been created in the particular commit. Now our BaseZap dir is ready to be pushed to any git services online like GitHub, GitLab, BitBucket, etc.

– We will use github.com for showing the web need steps to create a repository and push them.
Login to Github account and go to the homepage and look for the following button titled. ‘New Repository’
![]()
– It will ask us repository related details that we need to fill as our wish.
Note – There are 2 types of repositories,
Private – These are type of repos which can only be accessed by the owner or collaborator to the particular repo.
Public – These are types of repos which can be accessed by anyone who is able to access GitHub.
We filled it as below and made new Repository named BaseZap,
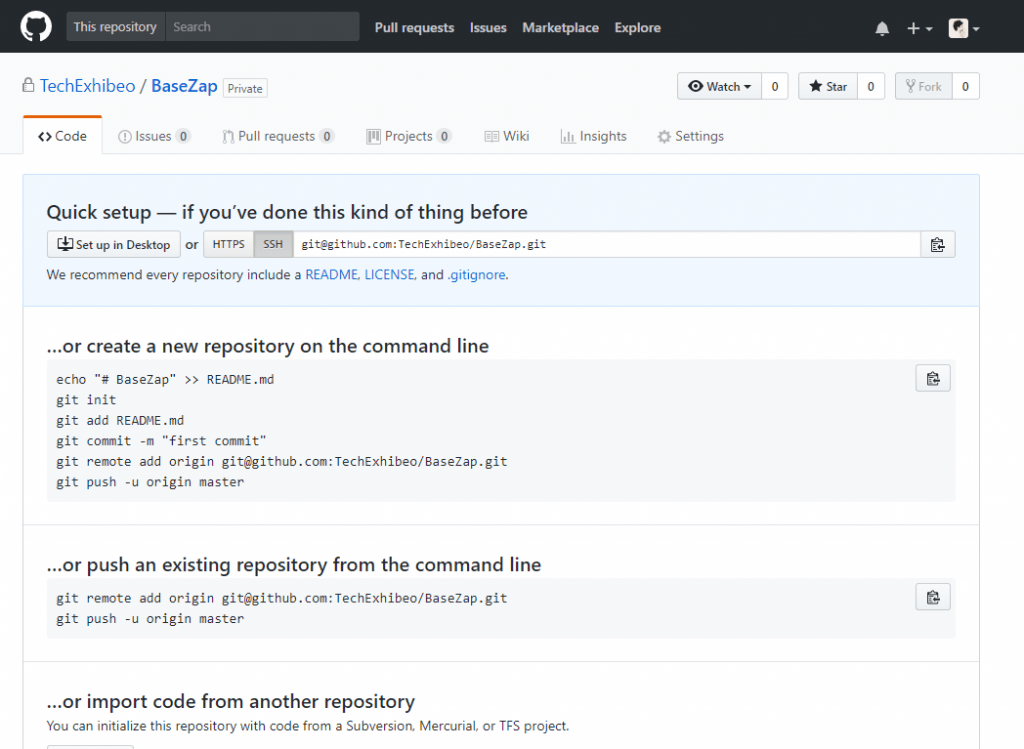
– After filling up the details tap on ‘Create Repository’ Button, and it will show some screen with commands like below,
 We will copy the repository URL with HTTPS that’s given in the text box. For us its https://github.com/TechExhibeo/BaseZap.git
– We will go to terminal and run command
git remote add bz-tut
https://github.com/TechExhibeo/BaseZap.gitThis means we are adding a remote link to BaseZap repo on GitHub with name ‘bz-tut’ for recognition.
![]()
– Now create a branch with some logical name using command
git branch branch_name
in image our branch_name is tutorials.
![]()
– If you have finished working on your directory, then you can run
git checkout branch_name
so that it is ready to be pushed to GitHub with branch name you checkout.it shows “Switched to branch ‘tutorials’ which means that commits are ready to be pushed to branch ‘tutorials’.
![]()
– Now we will push the code to GitHub repository that we created few steps above.
git push –u bz-tut tutorials
 It will ask us GitHub account ID and Password, so we need to enter it then our push command will proceed. So below screenshot says we have pushed BaseZap dir to GitHub repository.
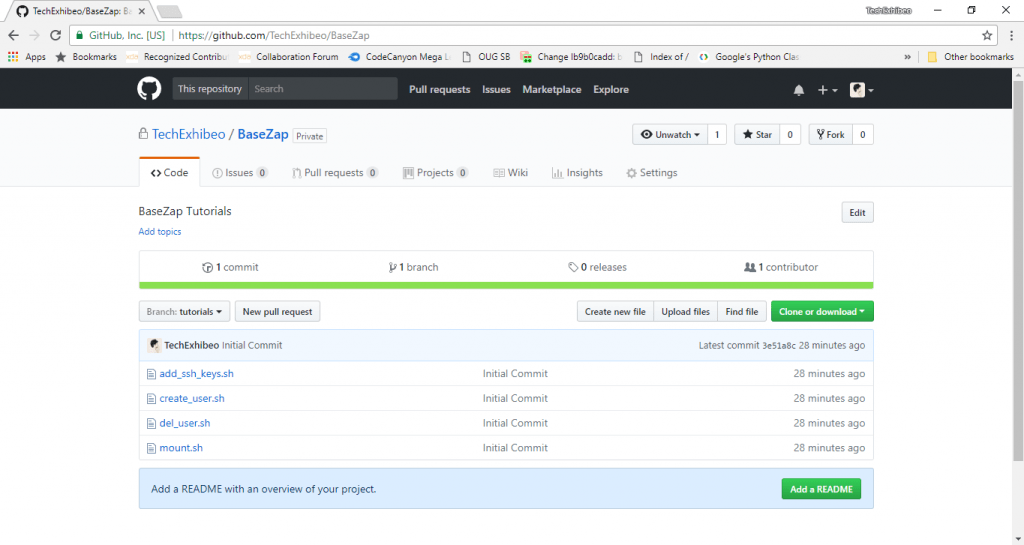
– Now we can check our online repository and have a look how it looks when we see our dir on the web, for us it shows like below.

– We have now successfully created the git repository for BaseZap directory with the help of git and GitHub Service.
We hope this guide was easy to follow and all steps are clear. If you have any queries regarding this guide, feel free to contact us, it will be a great honour to help you out.
Thank You.


